
Opening and Closing the Xserve
Before you can install or replace memory, PCI cards, or the system battery, you need to
shut down the Xserve, remove it from the rack, and open it.
Working Safely Inside the Xserve
Always touch the Xserve chassis to discharge static electricity before you handle
any components inside the Xserve. To avoid generating static electricity, do not walk
around the room until you have finished installing the expansion card, memory,
or other internal component and have replaced the Xserve cover. To minimize the
possibility of damage due to static discharge, wear an antistatic wrist strap while you
work inside the Xserve.
To open the Xserve:
1
Shut down the Xserve (see the Xserve User Guide for help) and then wait a few minutes
to let the Xserve internal components cool.
WARNING:
Always shut down the Xserve before opening it to avoid damaging its
internal components or the components you want to install. Don’t open the Xserve or
try to install items inside while it is turned on. Even after you shut down the Xserve,
its internal components can be very hot. Let it cool down before you open it.
2
If the Xserve case is locked, use the enclosure key to unlock the security lock on the
front panel.
3
Unplug all cables from the Xserve.
If you have trouble releasing a cable from the back panel, try using a small screwdriver
or other flat tool to depress the tab on the cable connector.
31
Chapter 2
Installing or Replacing Components
4
Loosen the thumbscrews at both ends of the front panel.
5
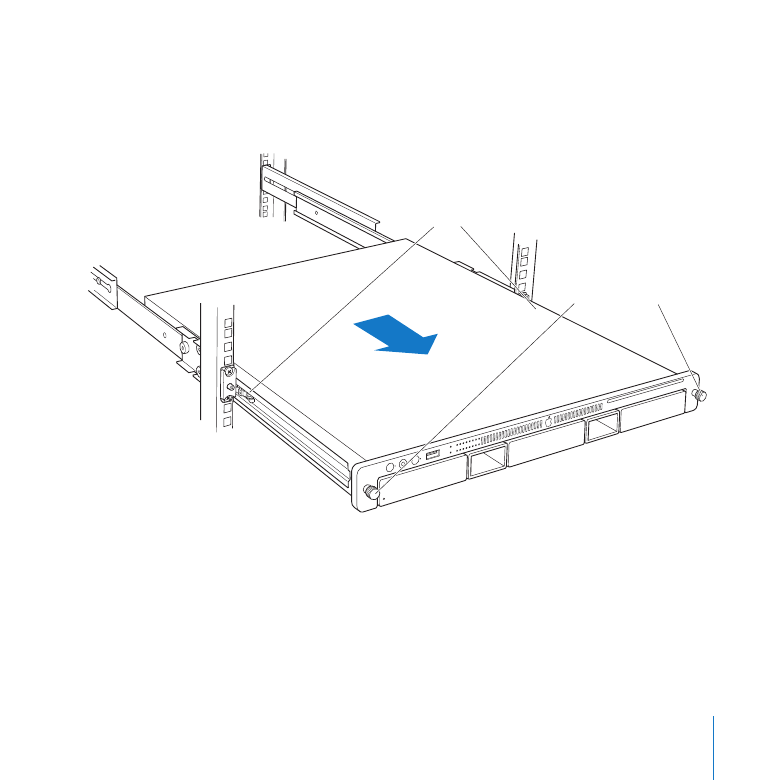
Grasp the thumbscrews and pull the Xserve forward until the safety latches engage
(about halfway out of the rack).
Latches
Thumbscrews
6
When the safety latches engage, grip the Xserve where it emerges from the rack, press
down on the latch tabs with your thumbs, and slide the Xserve the rest of the way out
of the rack rails. Set the Xserve on a flat surface.
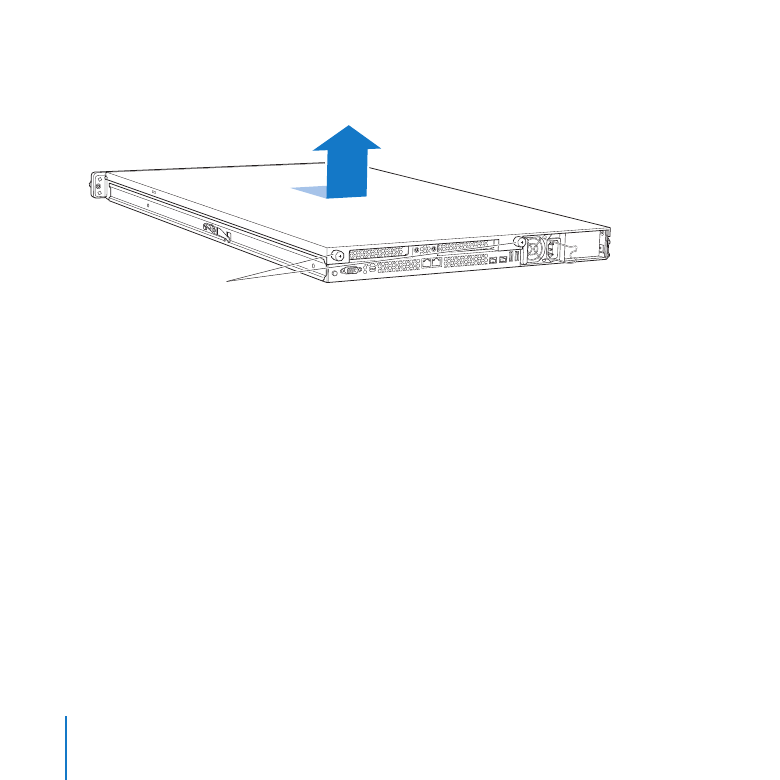
7
Loosen the thumbscrews at the back of the top cover and slide the cover back and up
to remove it.
If you have difficulty removing the cover, check the enclosure lock on the front panel.
32
Chapter 2
Installing or Replacing Components
Important:
To minimize the possibility of damage to Xserve components due to static
discharge, wear an antistatic wrist strap while you work inside the Xserve.
Unscrew the two
captive thumbscrews.
Slide the cover back and lift it off.
8
When you’re finished working inside the Xserve, replace and secure the cover, slide the
Xserve back into the rack, and tighten the front thumbscrews to secure the Xserve in
the rack. If the server case was locked, use the enclosure key to lock the security lock
on the front panel.

33
Chapter 2
Installing or Replacing Components