Installing or Replacing a Power Supply
You can install or replace a power supply from the back panel without removing the
Xserve from the rack. If the Xserve has two power supplies, they are hot-swappable;
the Xserve continues to operate using only one supply while the second is removed.
Important:
Install power supplies with a rating of at least 750 watts. The power supplies
from some earlier Xserves are rated at less than 750 watts.
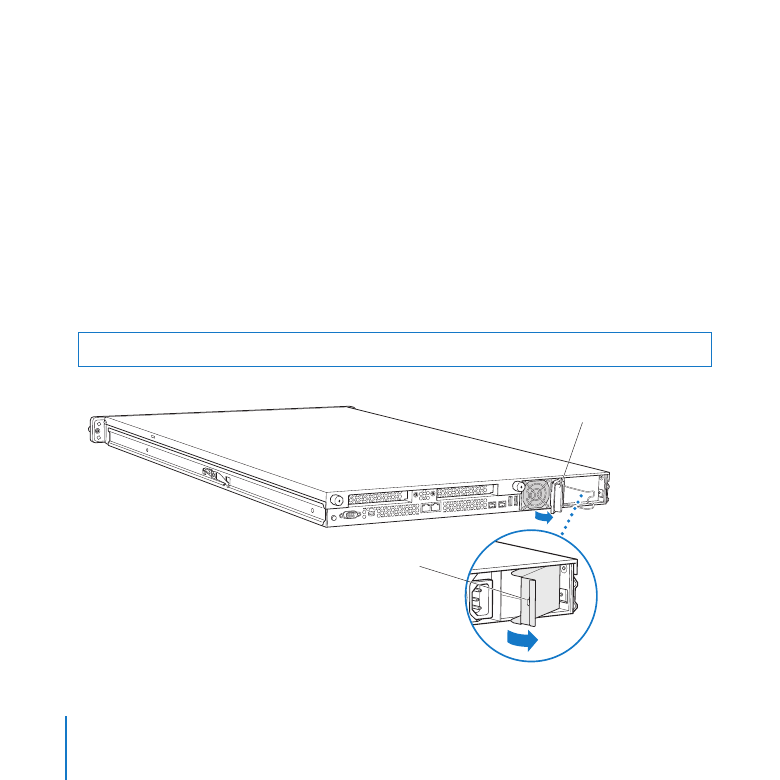
To remove a power supply:
1
Unplug the power cord from the power supply you are removing.
2
Pull the handle to release the power supply and slide it out of the bay.
WARNING:
The power supplies in a running Xserve might be hot.
Pull the handle to unlatch the
power supply and remove it.
To add a second power
supply, use the notch in the
power supply bay cover to
rotate the cover outward.
Remove and save the cover.

29
Chapter 2
Installing or Replacing Components
To install a power supply:
1
Pull open the handle on the new power supply, press on the wire fan screen (not the
handle) to slide the supply all the way into the bay, and then press the handle closed to
seat the power supply and lock it in place.
Attach the power cable
retainer to the power
supply, and clip it over
the power cable to hold
the cable securely in place.
Push on the fan grille
and not the handle
when inserting the
power supply.
Fan grille
Handle
2
Connect the power cord to the power supply.
If the Xserve is already running on a second power supply, the status light on the new
supply turns green to indicate normal operation as it starts sharing the load. If the
Xserve isn’t turned on, the supply status light blinks green when the power cord is
plugged in to an outlet with power.

30
Chapter 2
Installing or Replacing Components