Installing a PCI Express Card
The Xserve has two PCI Express (PCI-E) slots:
Slot 1 accepts 6.6 inch PCI-E cards
Â
Slot 2 accepts 9 inch PCI-E cards
Â
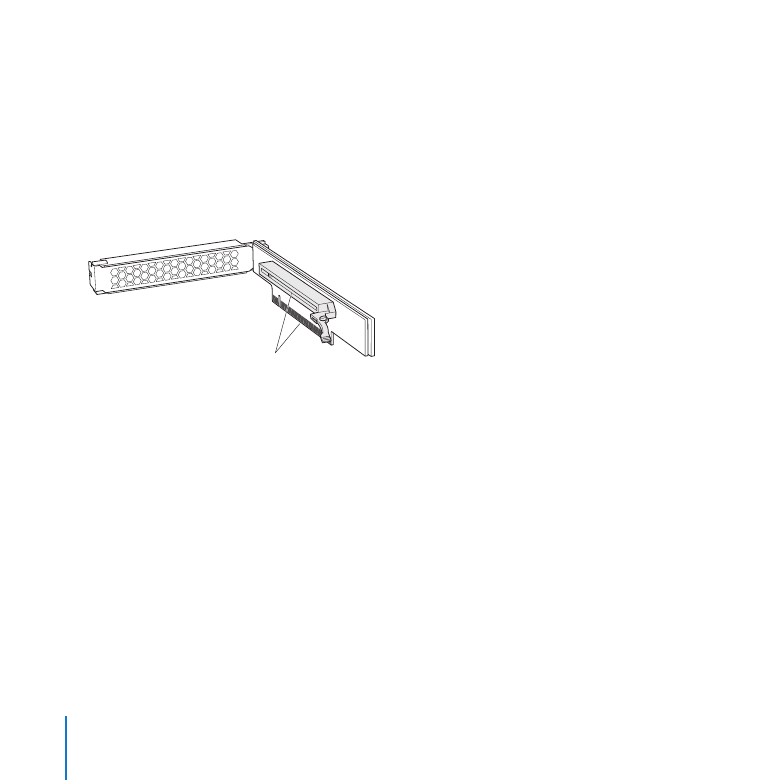
To install a card, you first insert it into the included riser, and then insert the riser into
the slot. Both slots accept the PCI-E riser shown below.
Connectors on PCI Express x16 riser
About PCI Express Cards for the Xserve
The Xserve accepts cards that meet these specifications:
x16 PCI-E cards
Â
6.6 inch maximum length (slot 1), 9 inch (slot 2)
Â
25 W maximum power consumption per card
Â
To install a PCI-E card:
1
Shut down the Xserve and unplug all cables.
Important:
Be sure the Xserve is turned off and the power cords are unplugged before
you install or remove a PCI-E card or riser.
2
Remove the Xserve from the rack and open it. For instructions, see “Opening and
Closing the Xserve” on page 30.
39
Chapter 2
Installing or Replacing Components
WARNING:
Always wait 5 to 10 minutes for the Xserve to cool down before you work
around the PCI-E slots. Components near the slots may be very hot.
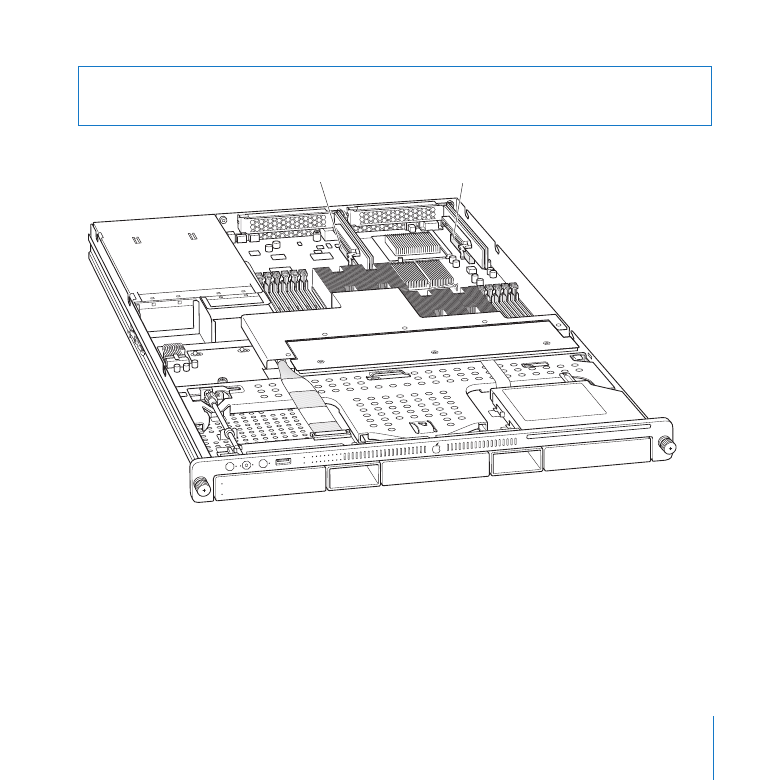
Expansion slot 1
(PCI Express x16)
Expansion slot 2
(PCI Express x16)
40
Chapter 2
Installing or Replacing Components
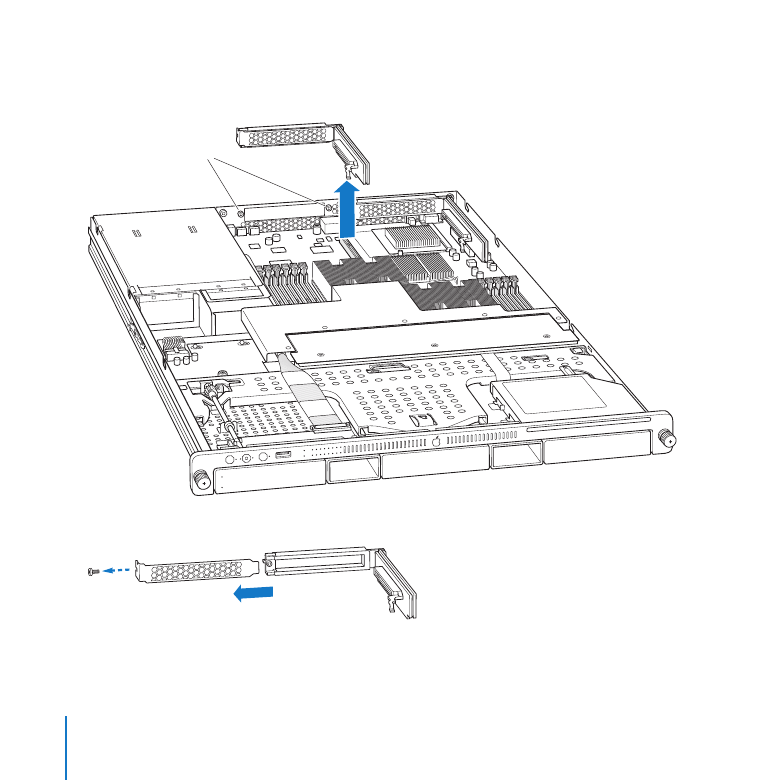
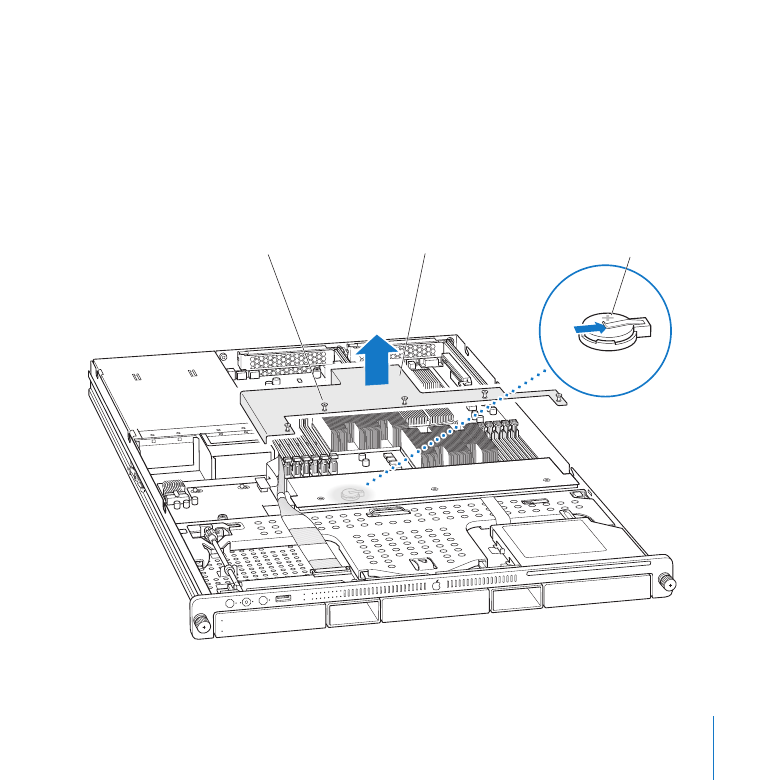
3
Loosen the two captive screws that secure the riser bracket to the back panel and
gently pull the bracket and riser straight up and out of the slot.
Captive screws
4
Remove the screw on the riser bracket, and then remove the port access cover.
41
Chapter 2
Installing or Replacing Components
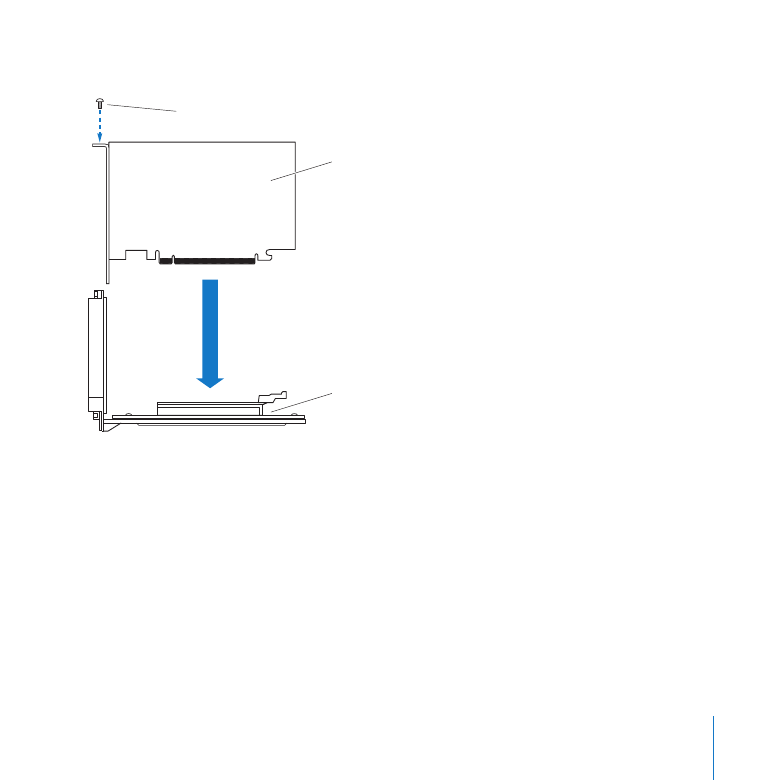
5
Seat the card in the riser slot and replace the screw to secure the card in the riser.
Screw
PCI card
PCI riser
42
Chapter 2
Installing or Replacing Components
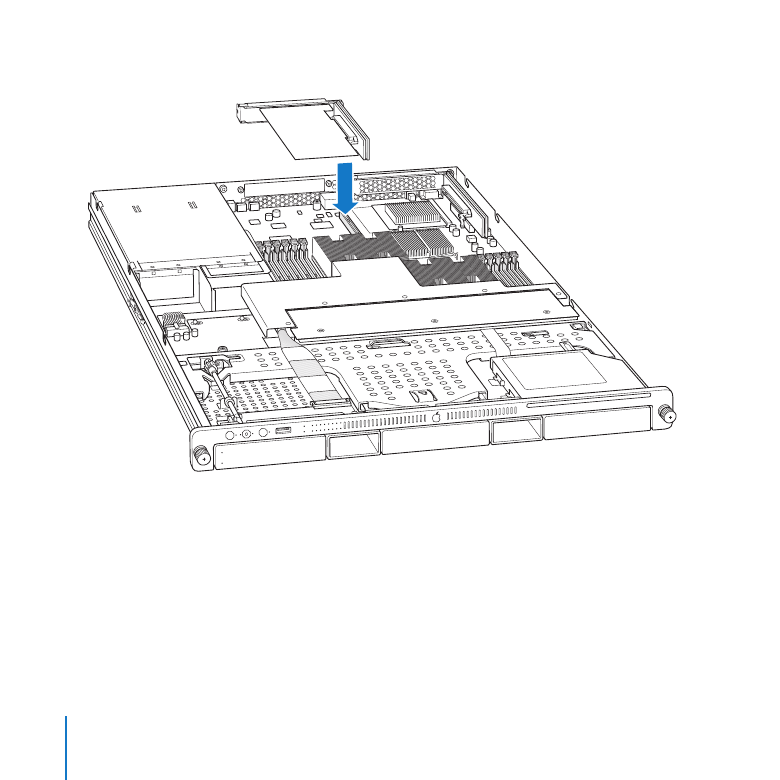
6
Align the riser with the slot on the main logic board and press to seat it.
7
Tighten the captive screws that secure the riser bracket to the back panel.
8
Return the Xserve to the rack and start it up.
9
Configure the card.
To configure an Ethernet card, open the Network pane of System Preferences.
To configure a Fibre Channel card, open Fibre Channel pane of System Preferences.
43
Chapter 2
Installing or Replacing Components